When customers reach out to me because they have a space at work or at home that needs to be soundproofed and their budget is limited, I always suggest starting with the ceiling.
Folks are often surprised, but the truth is, a ton of sound passes through ceilings. That can include airborne sounds like music or loud conversations, as well as vibrational noise created by machines or footstep sounds.

Soundproofing on Ceiling of Large Room
That’s why I’ve decided to put together a guide on how to soundproof a ceiling. We’ll cover why soundproof ceilings are essential, how to soundproof a ceiling, and specific products you can use from Acoustical Solutions. Let’s dive in!
Why Soundproofing a Ceiling is Important
Everyone wants to create a peaceful and quiet home or office. Whether you have noisy upstairs neighbors or want to make the best possible living or working experience for your tenants, soundproofing is incredibly important, and one of the most common areas that needs soundproofing is the ceiling.
Ceilings are often an issue because of how they were built. The only way to block noise is with material density and mass. Unfortunately, most ceilings are created with materials that aren’t dense enough or don’t have enough mass (especially in single-family homes and older commercial spaces), so they allow too much sound to travel between them.
In modern apartment buildings and commercial spaces, developers have started to make soundproofing a priority, but not always. If you’re in a residential or commercial space, that can be a significant problem.
No one wants to hear their neighbors stomping around or listening to loud music, and in most cases, noise transference is incredibly distracting, irritating, and disruptive. That’s why soundproofing is so important. It offers peace and serenity, and helps to create a quiet environment where you can live or work without disruption.
A Multilayered Approach to Soundproof a Ceiling
A common misperception is that e you can throw a few noise-canceling panels on your ceiling and call it good, but that’s unfortunately not the case. While panels can help reduce echoes, they aren’t sound magnets or vortexes that attract all the sound in a room to stop it from traveling to adjacent spaces.Think about it this way, if you’re trying to block air through a screen door, you can’t just cover part of it – you have to cover all of it!
The same principle applies to soundproofing a ceiling. If you want to create a soundproof ceiling, you have to cover the entire surface with something dense enough, or increase the thickness of the ceiling materials. To be effective, we recommend multiple layers of materials to help break up and stop sound waves from traveling through a ceiling or wall structure.
Soundproofing Gets Personal: Why Soundproofing is Especially Important for Multi-Family Residences (and Airbnb Hosts)
I once worked with a family that rented out their basement as an Airbnb. They had a finished basement, but the ceiling was only exposed beams for structural support (and probably an enhanced design aesthetic). The only thing separating the upstairs residence from the basement guests was one slab of material and the flooring, which was not soundproof at all.
The client’s daughter was an avid and classically trained dancer who, as you might expect, practiced inside the home. The Airbnb guests thought they were getting pranked because someone was dancing above their heads for extended periods every day. At the very least, it wasn’t helping their Airbnb rating, so they called us for help.
We solved the problem by soundproofing the basement ceiling. We started by adding ceiling insulation, then we followed up with the soundproofing layers we always recommend to our clients for a premium soundproof ceiling. Let’s break those layers down a bit:
Layer 1: Soundproofing Ceiling Insulation
When it comes to soundproof ceiling insulation, any insulation is better than none. You reduce sound transmission through the ceiling by adding density or increasing the mass of materials. It’s important to use insulation in a wall or ceiling build because in addition to helping with temperature control, insulation also prevents wall cavities from acting as a drum to amplify sound. That’s why ceiling insulation is so crucial to creating a soundproof ceiling.
Layer 2: AudioSeal® Mass Loaded Vinyl (MLV) Soundproofing Barrier

Closeup of 1 pound per square foot AudioSeal® Mass Loaded Vinyl Sound Barrier
The AudioSeal® Mass Loaded Vinyl (MLV) Soundproofing Barrier is the first layer we recommended adding after the ceiling insulation. It is attached to the joists to create a dense barrier between the flooring and the ceiling that blocks a lot of disturbing sound transference. NOTE: if you’re trying to keep your budget low, we highly recommend this product as a minimum for creating a soundproof ceiling.
Layer 3: Resilient Sound Isolation Clips (RSIC-1)
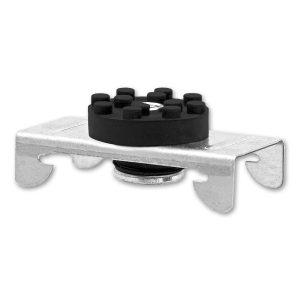
Resilient Sound Isolation Clip RSIC-1
Sound transference can occur when the ceiling and the flooring are touching. On the other hand, noise doesn’t travel well when it has to go through multiple pathways.
The Resilient Sound Isolation Clip, or RSIC Clip for short, works as an isolation tool that creates space between the ceiling and the flooring above, essentially separating the source of a sound and the ceiling. As a result, the sound vibrations get caught between the materials, which reduces sound transmission.
Layer 4: Green Glue Noiseproofing Compound Between Two Sheets of Drywall
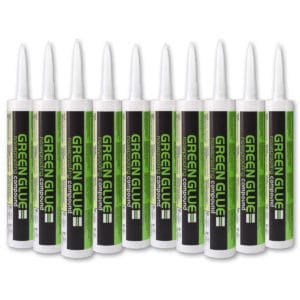
Green Glue Noiseproofing Compound – 28 oz. Tubes
The Green Glue Noiseproofing Compound is placed between two sheets of drywall that are installed over the RSIC clips and AudioSeal® Mass Loaded Vinyl (MLV) Soundproofing Barrier. This green glue “sandwich” creates a highly-dense layer of sound absorption that cuts out many of the sound transmission issues people tend to have with their ceilings.
Layer 5: Green Glue Noiseproofing Sealant
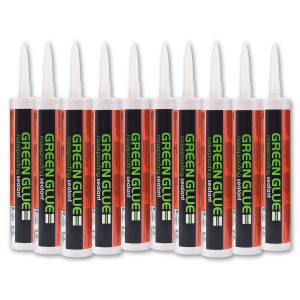
Green Glue Noiseproofing Sealant – 28 oz. Tubes
Finally, use Green Glue Noiseproofing Sealant to cover any remaining cracks and gaps around the edges of the drywall. This will help ensure that there won’t be any openings where sound waves and vibrations could pass through, and essentially cuts off any pathways for sound to travel.
Soundproofing Complete!
The multiple layers described above were pivotal in creating a dense barrier between the basement apartment and the dancer upstairs. Once all of these products were installed, there was no noise transference, which completely eliminated the problem my clients were having. Needless to say, the client was very happy with the results!
Create a Soundproof Ceiling with Acoustical Solutions
Creating a soundproof ceiling isn’t as simple as it sounds, but if you’d like to create a soundproof ceiling in your home or business, these are the layers we recommend. Of course, there are multiple options that might work better for you, depending on your ceiling materials and specific configuration.
Contact us today to learn more about our state-of-the-art soundproofing solutions!
To learn more about how Acoustical Solutions can solve your noise control problems, use our contact form, call one of our Acoustical Sales Consultants at (800) 782-5742, or visit us on the web at acousticalsolutions.com.